Showing posts with label New Year's Eve. Show all posts

Friday, January 1, 2010

Best Dessert Evah--Napoleons

Okay, so just as a disclaimer, I liked this dessert alot but would NOT have named it "The Best Evah"--my "Best Evah" would be more along the lines of a fresh squeezed key lime pie; HOWEVER, Red's fiance, Big D, did exclaim "T, I think this is the best dessert . . . Ever!"

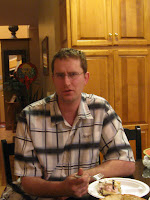
(this is Red's fiance Big D eating said dessert--and I realize he looks mad here but he's actually saying "Seriously!" and enjoying his dessert--I promise :)

I took the recipe base from Sandra Lee, who actually uses the method of Napoleons for alot of desserts. Take puff pastry and layer in fillings and you've got dessert! I took her basic recipe and just ramped up the cherry layer in particular--I LOVE Cherry flavored anything!

What I love about Napoleons as a dessert is you can prep everything ahead and then it's just assembly when you're ready for dessert! The other thing is everything in the recipe you see with an asterisk* can be made/purchased lowfat or sugar free--very easy to make healthy. (Been watching Biggest Loser marathon today so now inspired to point out things like that :)


Big D Black Forest Napoleon

Ingredients:
1 Box Frozen Puff Past
2 Boxes Chocolate Fudge Jello Pudding*
2 1/2 cups Milk*
1 cup whipping cream* (use all milk if making lite)
1 Cool Whip
1 can Cherry Pie Filling
1 jar Marachino Cherries
1 1/2 tsp Almond Extract
1/2 pkg Black Cherry Jello*
1 can RediWhip*
Hershey's Special Dark Syrup (!!!did you know they made a Special Dark Syrup? Brilliant!!)


Equipment:

2 bowls / tuperware containers that can hold about 4-5 cups
cookie sheet
Whisk


Okay, so for this recipe you prep 3 parts: the Puff Pastry, the Chocolate layer and the Cherry layer.

1. Puff Pastry Prep (say that 5 times fast!) Take out the Puff Pastry and let thaw for about 45 minutes; unfold and cut into 12 squares; then bake according to directions BUT watch it--if you get distracted by, say, a Twitter discussion (darn you @imaginaryfriends!), this could happen:


yeah, but they should look like this:


Once cooled you can put in a large ziplock bag for later.

2. Chocolate Layer: Combine Milk, Cream, and Chocolate Fudge Pudding mix (both packages). Using cream for part of the liquid will make it extra thick and fluffy. If you don't want to use cream, just use all milk but use about 3 1/2 cups. Let stand in fridge for 15 minutes and you're good to go.


3. Ramped Up Cherry Layer: Let the Cool Whip thaw. Combine the container of cool whip with the can of Cherry Pie Filling, 1 1/2 tsp Almond Extract--I use almond EVERY time I use cherry pie filling (it ramps up the flavor of cherry), about half of the juice from the jar of Marachino cherries and 1/2 a package of Black Cherry Jello. Combine and let set for at least 15 minutes in the fridge and, again, you're good to go!


4. Assembly: Take your puff pastry squares and seperate into 2 parts--you'll need 3 pieces for each Napoleon (so 3 squares = 6 parts = 2 napoleons). Layer pastry, chocolate, pastry, cherry fluff, pastry and then top with RediWhip, Dark Chocolate Syrup and a Cherry on top :)


*you could make this low sugar and low fat by using the lowfat/sugar free versions of the ingredients and layering the chocolate and cherry layers with lowfat graham crackers instead of puff pastry! I'm a big "dipper" and today I took the left over fillings and dipped graham crackers as a snack today :)


ENJOY! I thought they were delicious and Big D was raving.


New Years Pickles

There's a waitress at this little gas station cafe in my hometown in SD named Pickles--it's my Dad's favorite place to get lunch (a hamburger steak) and he takes my son, A, there EVERY time to visit Pickles. I think it's hilarious. And this post has nothing to do with that--except for the pickles part :)

Okay, so I've had New Year's experiences that run the gamut--from staying at home alone watching the Bourne trilogy (except I drank two glasses of wine, got tipsy, and accidentally watched #3 before #2 and will forever be confused by those movies now!) to going out downtown and making a potential fool of myself (in my *ahem* younger days) to hosting a prime rib dinner party (my favorite New Years). This year my dear friend "Red"


hosted a random buffet feast at her new pad. Here she's with her fiance' Big D--I LOVE Big D (not just cause he's a great guy and loves my friend Red, but also) because he gets along awesome with my son A. A doesn't get too excited about much but he really likes hanging out with Big D--which is the only reason I was able to talk A into coming along to last night's gathering :) Red and Big D are getting married New Year's Eve 2010 (one year from yesterday, on their 4 year anniversary) in Hawaii and I plan to be there to blog about it!

Red LURVES Pickles--as does A (as does Bestie Mama M--though I've never made them for her . . . yet) and Red overheard A recently talking about how I never make my famous Fried Pickle Coins for him any more. Red immediately made me promise I'd make them for her New Year's celebration. Done and done! Plus since I had to make them at her place, I knew I'd automatically be more tidy than normal.

The Unkept Cook Fried Pickles:

Ingredients:
Gedney Pickle Planks*
2 cups Flour
1/2- to 2/3 cup Corn Starch
Kosher or Sea Salt (table salt will work--Kosher or Sea sticks better)
Grill Seasoning
3 Eggs OR Egg Substitute
Tabasco OR Siracha Sauce**
Peanut Oil for frying
Optional: Bleu Cheese Dressing for dipping

*I used to do regular pickle coins and MAN ALIVE I'd be frustrated at the end of this process to only have those tiny things. So by using planks--same amount of work but alot more yummy produced :)

**I used to use Tabasco sauce in my egg wash to add flavor, but last night I forgot to bring it and Red only had Siracha--I'd definitely use Siracha over Tabasco--Siracha has more flavor to go with the heat.

Equipment Needed:
Paper Towels--alot of them
4 large plastic plates (with high sides--most do have high (2" ) sides
3 Forks
Large flat bottomed frying pan

Production:
Okay, so I don't do these often because they are a bit of a production, BUT I don't ever crave pickles and I LOVE these (of course what's not to love about breaded and fried?). A LOVES them and last night ate about half of the 50 I made!

Step One: Dry the pickles. The trick to a good fried pickle is getting alot of the moisture out of it before you coat it (so the coating sticks) and so that it fries crispy. So lay a stack of 4-5 paper towls out and lay the pickle planks flat and then lay a few papertowels on top to soak up the juice. I replaced the top paper towels twice. I do this about 30 minutes before I'm going to coat and fry.

Step Two: Set up your coating/breading stations. Using your plastic plates (use the plastic plates so you can just throw them away later!)

  1. First Plate: 1 Cup Flour--that's it, just flour
  2. Second Plate: 3-4 eggs whisked OR egg substitue (which is what I used because it's more of a consistent liquid). Here is where you add your flavor and seasoning because it stays trapped under the coating and doesn't slide off into the oil! I don't like much heat, but the Tobasco/Siracha will add a fun flavor background and I promise it's not too hot! Add 1-3 Tsp of Siracha and a 1/2 Tbsp of Grill Seasonining and whisk the egg mixture to encorporate.
  3. Third Plate: 1 Cup Flour, 1/2 to 2/3 cup of Corn Starch (Corn Starch makes your coating more crispy!)
  4. Fourth Plate--to place the prepped pickles ready to go into the oil

Step Three: Prep Oil. I use Peanut Oil because it fries better and generally makes coating lighter and crispier. I don't use a thermometer and have no real idea how hot it SHOULD be but turn the burner to about 6 (Med High). If it starts snapping on its own, it may be a bit too high. I then place several papertowls down and a wire cooling rack over them next to the stove.

Step Four: Coat. Take each pickle plank, coat each side with the flour, then place in the each in the egg wash and use a fork to flip and coat the pickle in the egg and place in the Flour/Corn Starch plate. Use a new fork to flip and coat and then place on a plate ready to go in the oil. My pan can fit about 7-8 pickle planks per batch, so I coat that many at a time.

Step Five: Fry. Place the coated pickles in the hot oil and wait til they are crispy and slightly browned then flip. If your oil isn't hot enough the coating will get oily instead of crisp. Take them about and let them cool on the rack. Hit them with a little grill seasoning or salt when they come out while they're hot.

Step Six: ENJOY! (oh and try them with a little bleu cheese dressing on top)

Step Seven: ONLY required if you're prepping this in someone else's kitchen--drain the used oil after it's cooled and wash out the pan; throw away all plastic plates and wipe down your mess.

Aren't pickles supposed to be lucky or something? Sure! Yeah, I'm positive I heard that somewhere! So here's to a Lucky and, more more importantly (and likely) BLESSED 2010!!